





How to make a crystal elephant craft?
As a seasoned supplier of crystal crafts, I'm thrilled to share with you the enchanting process of creating a crystal elephant craft. Crystal elephants not only serve as beautiful decorative pieces but also carry symbolic meanings of wisdom, strength, and good luck. In this guide, I'll walk you through the steps, materials, and techniques to bring your very own crystal elephant to life.
Materials You'll Need
Before we embark on this creative journey, let's gather the essential materials. You can source these items from various craft stores or, of course, from our wide - range of crystal products.
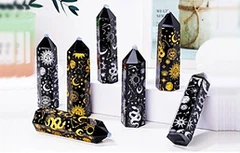
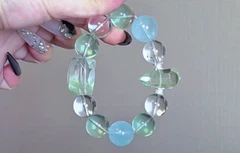
- Crystal pieces: You can choose from different types of crystals such as quartz, amethyst, or citrine. You might consider our Natural Crystal Pendant as a source of high - quality crystal fragments. These pendants come in various shapes and sizes, providing you with a rich palette of crystal colors and textures.
- Glue: A strong, clear - drying glue is essential for adhering the crystal pieces together. Epoxy glue or super glue works well for this purpose.
- Elephant mold: You can find elephant molds made of silicone or resin at craft stores. The mold will determine the shape of your final crystal elephant.
- Sandpaper: Different grits of sandpaper, from coarse to fine, will be used to smooth the surface of the crystal elephant after it's assembled.
- Base: A small wooden or stone base can be used to display your crystal elephant. It adds stability and an extra touch of elegance.
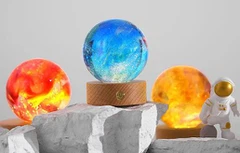
- Optional: Natural Crystal Ball and Natural Crystal Crushed Stone. The crystal ball can be incorporated into the design as an eye or a decorative element, while the crushed stone can be used to fill in gaps or add texture.
Step 1: Prepare the Crystal Pieces
Start by examining your crystal pieces. If you're using crystal pendants, carefully break them into smaller fragments. You can use a hammer and a piece of cloth to wrap the pendant to prevent the crystal from shattering everywhere. Make sure to wear safety goggles during this process.
Once you have your crystal fragments, sort them by size and color. This will make it easier to arrange them later. You can also use sandpaper to smooth any rough edges on the crystal pieces. Start with a coarse - grit sandpaper and gradually move to a finer grit for a polished finish.
Step 2: Prepare the Elephant Mold
Before you start placing the crystal pieces, prepare the elephant mold. Apply a thin layer of mold release spray or petroleum jelly to the inside of the mold. This will make it easier to remove the finished crystal elephant later.
Step 3: Arrange the Crystal Pieces
Begin arranging the crystal pieces in the mold. You can start from the bottom and work your way up, or you can create a pattern based on the colors and sizes of the crystals. If you're using a crystal ball as an eye, place it in the appropriate position early in the process.
Use the glue to attach the crystal pieces to each other and to the mold. Be careful not to use too much glue, as it can seep out and create a messy appearance. Apply the glue sparingly to the edges of the crystal pieces and press them firmly together.
As you work, you can use the crushed stone to fill in any gaps between the crystal pieces. This will give your crystal elephant a more cohesive and textured look.
Step 4: Let the Glue Dry
Once you've arranged all the crystal pieces in the mold, let the glue dry completely. This can take several hours or even overnight, depending on the type of glue you're using. Follow the instructions on the glue packaging for the best results.
Step 5: Remove the Crystal Elephant from the Mold
After the glue has dried, carefully remove the crystal elephant from the mold. If the mold release was applied correctly, the elephant should come out easily. If there are any parts that are still stuck, you can gently use a tool like a toothpick to loosen them.
Step 6: Finishing Touches
Inspect the crystal elephant for any rough edges or uneven surfaces. Use sandpaper to smooth these areas. Start with a coarse - grit sandpaper to remove any major imperfections, and then switch to a fine - grit sandpaper for a polished look.
You can also use a soft cloth to buff the crystal elephant and bring out its shine. If you want to add more sparkle, you can apply a thin layer of crystal polish.
Finally, attach the crystal elephant to the base using glue. Make sure it's centered and secure.
Tips and Tricks
- Experiment with different crystal combinations to create unique color schemes and patterns.
- If you're new to working with crystals, start with a small - sized elephant mold to get the hang of the process.
- When using glue, work in a well - ventilated area to avoid inhaling fumes.
- Don't be afraid to make mistakes. Each crystal elephant is unique, and imperfections can add character.
Conclusion
Creating a crystal elephant craft is a rewarding and creative process. It allows you to express your artistic side while working with the beauty and energy of crystals. Whether you're making it for yourself or as a gift, a crystal elephant is sure to be a cherished item.


If you're interested in sourcing high - quality crystal materials for your next craft project, we're here to help. As a leading supplier of crystal crafts, we offer a wide range of products, including Natural Crystal Pendant, Natural Crystal Ball, and Natural Crystal Crushed Stone. We're always open to discussing your specific needs and requirements. If you're looking to purchase in bulk for a commercial project or just want to stock up on some beautiful crystals for your personal crafts, feel free to reach out to us for a detailed quote and to start a procurement discussion.
References
- Crafting with Crystals: A Beginner's Guide. Craft Magazine, 20XX.
- The Art of Crystal Arrangement. Crystal Arts Journal, 20XX.


