






Embarking on the journey of 3D crystal painting can be an incredibly rewarding experience, blending creativity with a touch of sparkle. As a supplier deeply entrenched in the world of 3d Crystal Painting, I'm excited to share a comprehensive guide on how you can start this captivating art form.

Understanding 3D Crystal Painting
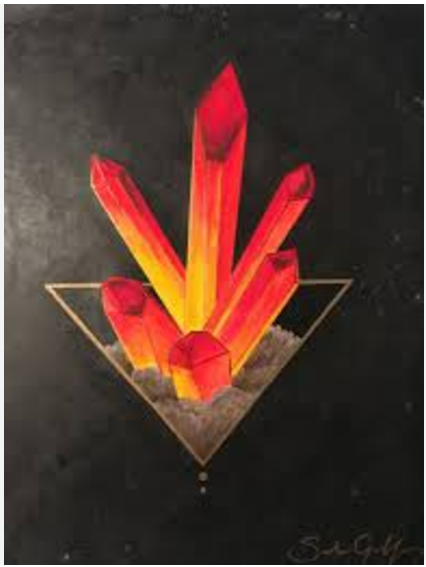
Before diving into the process, it's essential to grasp what 3D crystal painting entails. It's a unique form of art that combines the beauty of crystals with the creativity of painting. Unlike traditional paintings, 3D crystal paintings add an extra dimension, literally, with the use of crystals that protrude from the surface, creating a visually stunning and tactile experience.
The allure of 3D crystal painting lies in its versatility. Whether you're drawn to Crystal Art Painting, which often features intricate and detailed designs, or Abstract Crystal Painting, where you can let your imagination run wild, there's a style to suit every artist's preference.
Gathering Your Supplies
The first step in starting your 3D crystal painting journey is to gather the necessary supplies. Here's a list of the essentials:
- Canvas: Choose a high - quality canvas that is suitable for crystal painting. The size and texture can vary depending on your project. A smooth canvas surface is often preferred as it provides a better base for attaching the crystals.
- Crystals: There is a wide variety of crystals available, differing in size, color, and shape. You can opt for pre - sorted crystal kits that come with a range of colors, or you can mix and match your own based on your design concept.
- Glue: A strong and fast - drying glue is crucial for attaching the crystals to the canvas. Make sure the glue is non - toxic and does not leave any residue that could affect the appearance of the painting.
- Applicator Tools: Tweezers are the most commonly used tool for picking up and placing the crystals precisely on the canvas. You may also want to consider using a crystal pen, which uses a wax tip to pick up the crystals more easily.
- Design Template: If you're new to 3D crystal painting, using a design template can be extremely helpful. You can find pre - printed templates online or create your own using design software.
Preparing Your Workspace
Creating a comfortable and organized workspace is vital for a successful 3D crystal painting session. Here are some tips:
- Clean and Flat Surface: Choose a clean and flat surface to work on, such as a table or a desk. This will ensure that your canvas lies flat and the crystals can be placed accurately.
- Good Lighting: Adequate lighting is essential for seeing the details of your work. Natural light is ideal, but if that's not available, use a bright lamp to illuminate your workspace.
- Storage for Supplies: Keep your crystals, glue, and tools organized in separate containers or compartments. This will make it easier to find what you need and prevent any mix - ups.
Choosing Your Design
The design of your 3D crystal painting is where your creativity truly shines. You can choose from a wide range of designs, including landscapes, portraits, animals, or abstract patterns. If you're using a pre - printed template, make sure it's something that inspires you.
If you're feeling adventurous, you can also create your own design. Start by sketching out your idea on paper, then transfer it to the canvas. Consider the color palette of your crystals and how they will interact with each other to create a cohesive design.
Applying the Glue
Once you have your design in place, it's time to start applying the glue. Using your applicator tool, carefully apply a small amount of glue to the area where you want to place the crystal. Be precise with your application, as too much glue can cause the crystals to stick together or create a messy appearance.
It's a good idea to work in small sections at a time. This will ensure that the glue doesn't dry out before you have a chance to place the crystals. As you apply the glue, make sure to cover the entire area where the crystal will be placed.
Placing the Crystals
With the glue applied, it's time to start placing the crystals. Use your tweezers or crystal pen to pick up a single crystal and place it on the glued area. Press down gently to ensure that the crystal adheres firmly to the canvas.
Take your time with this step, as precision is key to creating a beautiful 3D crystal painting. Pay attention to the orientation of the crystals and how they fit together to create the desired pattern. If you make a mistake, you can carefully remove the crystal using a pair of tweezers and re - apply it.
Building Layers and Adding Depth
One of the unique aspects of 3D crystal painting is the ability to build layers and add depth to your artwork. Once you have completed the first layer of crystals, you can start adding additional layers on top. This can be done by placing larger or differently shaped crystals on top of the existing ones.
As you build layers, consider the lighting and how it will interact with the crystals. Different angles of light can create a stunning visual effect, highlighting the depth and texture of your painting.
Finishing Touches
After you have placed all the crystals and built the desired layers, it's time to add the finishing touches. Check your painting for any loose crystals and re - glue them if necessary. You can also use a soft brush to gently remove any dust or debris from the surface of the crystals.
Let your painting dry completely before handling it. Depending on the type of glue you used, this can take anywhere from a few hours to overnight. Once dry, your 3D crystal painting is ready to be displayed and admired.
Maintenance and Care
To ensure that your 3D crystal painting lasts for a long time, it's important to take proper care of it. Avoid exposing the painting to direct sunlight for extended periods, as this can cause the crystals to fade. Dust the painting regularly using a soft, dry cloth to keep it looking its best.
Connecting with the Community
One of the best ways to enhance your 3D crystal painting experience is to connect with other artists. Join online forums or social media groups dedicated to crystal painting. Here, you can share your work, get inspiration from others, and learn new techniques.
Why Source from Us
As a supplier, we take pride in offering high - quality products for your 3D crystal painting needs. Our crystals are sourced from the best manufacturers, ensuring vibrant colors and excellent clarity. We also offer a wide range of design templates and kits to suit every skill level, from beginners to experienced artists.
If you're interested in starting your 3D crystal painting journey or looking to expand your collection of supplies, we'd love to hear from you. Whether you're a hobbyist or a professional artist, we can provide you with the products and support you need. Contact us to discuss your procurement needs and start creating your own sparkling masterpieces.
References
- "The Art of Crystal Painting" - A comprehensive guidebook on crystal painting techniques and styles.
- Online resources and tutorials from experienced 3D crystal painters.


