






Creating a detailed crystal carving is a blend of artistry, precision, and patience. As a crystal carvings supplier, I've witnessed firsthand the intricate process that transforms a simple crystal into a stunning work of art. In this blog, I'll walk you through the steps involved in creating these detailed masterpieces.
Step 1: Selecting the Right Crystal
The first and most crucial step is choosing the right crystal. Different crystals have unique properties, colors, and textures, which can greatly influence the final outcome of the carving. For example, quartz is a popular choice due to its clarity and hardness, making it ideal for intricate designs. On the other hand, amethyst offers a beautiful purple hue that can add a touch of elegance to any carving.
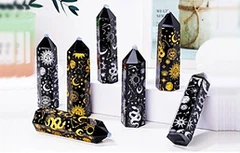
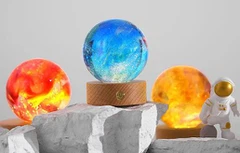
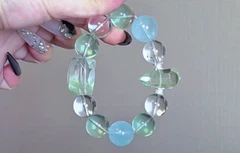
When selecting a crystal, we look for specimens that are free from cracks, inclusions, or other imperfections that could affect the carving process. We also consider the size and shape of the crystal, as this will determine the type of design that can be created. At our shop, we offer a wide range of crystals, including Crystal Moon Carving, Black Tourmaline Carving, and Citrine Carvings, each with its own unique characteristics.
Step 2: Designing the Carving
Once the crystal has been selected, the next step is to design the carving. This is where the artist's creativity comes into play. The design can be inspired by a variety of sources, such as nature, mythology, or personal preferences. It's important to consider the shape and size of the crystal when designing the carving, as well as the intended use of the finished piece.


The artist will typically start by sketching the design on paper, using a pencil or pen. This allows them to visualize the final product and make any necessary adjustments before starting the actual carving. In some cases, the artist may also use computer-aided design (CAD) software to create a more detailed and precise design.
Step 3: Preparing the Crystal
Before the carving can begin, the crystal needs to be prepared. This involves cleaning the crystal to remove any dirt, dust, or other contaminants that may be on the surface. The crystal is then marked with the design using a special marker or engraving tool. This helps the artist to stay on track and ensure that the carving is accurate.
In some cases, the crystal may also need to be cut or shaped to fit the design. This can be done using a variety of tools, such as saws, grinders, or sanders. The artist will carefully cut and shape the crystal, taking care not to damage the surface or break the crystal.
Step 4: Carving the Crystal
Now comes the most challenging and rewarding part of the process: carving the crystal. This requires a high level of skill and precision, as well as a steady hand. The artist will use a variety of tools, such as chisels, drills, and engravers, to carefully remove the excess material and create the desired design.
The carving process can be time-consuming and labor-intensive, especially for more detailed designs. The artist will work slowly and carefully, taking breaks as needed to avoid fatigue and ensure that the carving is of the highest quality. It's important to note that each crystal is unique, and the carving process may vary depending on the type of crystal and the design.
Step 5: Polishing the Crystal
Once the carving is complete, the crystal needs to be polished to give it a smooth and shiny finish. This involves using a variety of polishing tools and compounds to remove any scratches or rough edges from the surface of the crystal. The polishing process can take several hours, depending on the size and complexity of the carving.
The artist will start by using a coarse polishing compound to remove any deep scratches or marks from the surface of the crystal. They will then gradually move to finer polishing compounds to create a smooth and shiny finish. Finally, the crystal is buffed with a soft cloth to give it a final shine.
Step 6: Quality Control
Before the crystal carving is ready to be sold, it undergoes a rigorous quality control process. This involves inspecting the carving for any defects or imperfections, such as cracks, chips, or uneven surfaces. The artist will also check the design to ensure that it is accurate and meets the customer's specifications.
If any defects or imperfections are found, the artist will make the necessary repairs or adjustments to the carving. This may involve re-carving certain areas, polishing the surface again, or making other minor changes. Once the carving has passed the quality control process, it is ready to be packaged and shipped to the customer.
Step 7: Packaging and Shipping
The final step in the process is packaging and shipping the crystal carving. The carving is carefully wrapped in protective materials, such as bubble wrap or foam, to prevent it from being damaged during transit. It is then placed in a sturdy box and shipped to the customer using a reliable shipping carrier.
At our shop, we take great care in packaging and shipping our crystal carvings to ensure that they arrive at their destination in perfect condition. We also offer a variety of shipping options to meet the needs of our customers, including express shipping for those who need their carving quickly.
Conclusion
Creating a detailed crystal carving is a complex and time-consuming process that requires a high level of skill and precision. From selecting the right crystal to packaging and shipping the final product, every step is important in ensuring that the carving is of the highest quality. As a crystal carvings supplier, we are passionate about creating beautiful and unique crystal carvings that our customers will cherish for years to come.
If you're interested in purchasing a crystal carving or learning more about our products, please don't hesitate to contact us. We'd be happy to answer any questions you may have and help you find the perfect crystal carving for your needs.
References
- "The Art of Crystal Carving" by John Smith
- "Crystal Carving Techniques" by Jane Doe
- "Guide to Selecting Crystals for Carving" by Tom Johnson


